Settings hold everything, and reaching a setting through them takes several steps. The quick menu shortens that distance: a panel behind the Q button holding the controls worth reaching for without leaving the viewfinder. This chapter covers the menu, the tiles it offers in each mode, and how to arrange them.
22.1 The Quick Menu
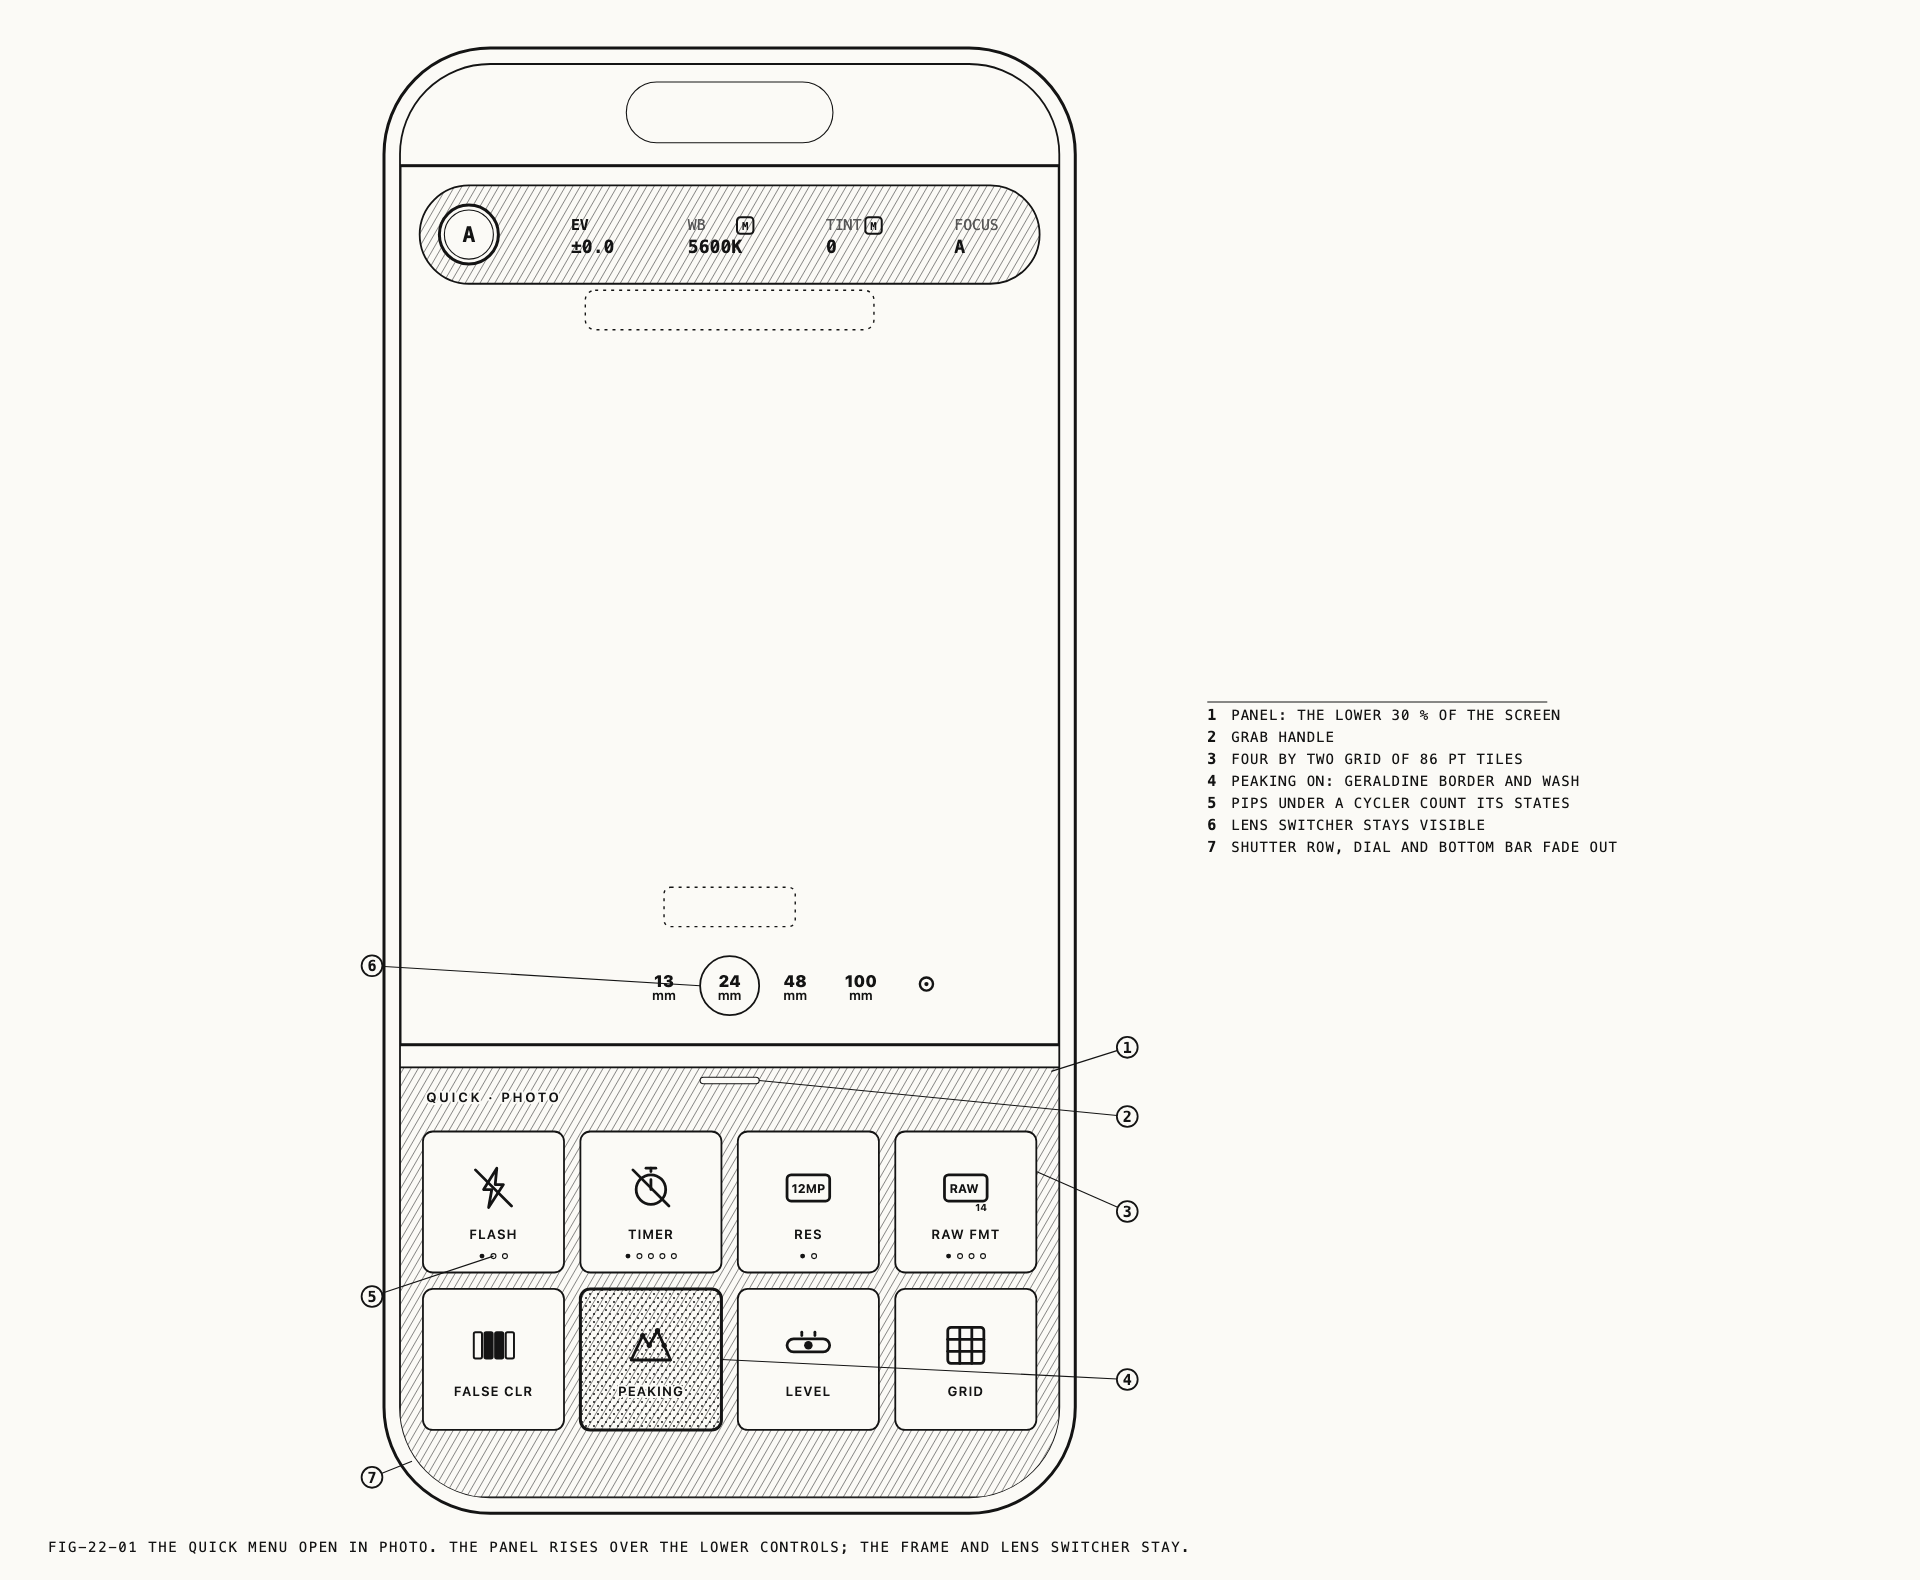
The Q button on the bottom bar opens the quick menu, a panel that rises from the bottom edge of the device and holds the controls worth reaching for without leaving the viewfinder. The controls it covers fade while it is open and return when it closes. Tap outside the panel or swipe down to dismiss it.
Tiles are laid out four across and two down. A panel with more than eight tiles pages sideways, and dots below the grid report which page you are on. The panel is anchored to the same edge of the device however the phone is held, so in landscape the same grid reads as two columns of four, with the contents of each tile turned upright. Tiles keep their positions relative to one another through the change.
There are two kinds of tile. A switch has two states and a tap flips it, with the on state marked in color. A cycler holds an ordered list of values and a tap advances to the next one, wrapping at the end, with small dots under the value showing where in the list you are. Values the camera cannot currently offer are passed over.
Press and hold a cycler to see its values in full. The panel slides across to a list of every option under its full name, and tapping one selects it and returns. The back control in the header leaves the list without changing anything.
Tiles that would change the recording format are unavailable while a recording is running, and cannot be opened for browsing either. Everything else stays live.
The panel follows the drive mode as well as the capture mode, so photo, burst, interval and video each present their own tiles. The monitoring tiles hold the same positions in every panel, so they can be found without looking.
| Tile | Sets | Shown in |
|---|---|---|
FLASH | Flash mode | Photo |
TIMER | Self-timer delay | Photo |
RES | Photo resolution | Photo |
RAW FMT | Raw format | Photo |
FPS | Frames per second | Burst |
PRE-CAP | Pre-capture | Burst |
QUALITY | Burst quality | Burst |
PROGRAM | The active interval program | Interval |
RES | Video resolution | Video |
FPS | Frame rate | Video |
CODEC | Video codec | Video |
STAB | Stabilization | Video |
FALSE CLR | False color | All |
PEAKING | Focus peaking | All |
GRID | Composition grid | All |
LEVEL | Level gauge | Photo, burst, interval |
WAVEFORM | Waveform monitor | Video |
Each of these settings is explained in the chapter that owns it: stills in Chapter 7, burst in Chapter 8, the intervalometer in Chapter 9, video in Chapter 10, and the monitoring tools in Chapter 6. A tile writes the same setting the settings page does. There is no separate quick version of a control.
22.2 Arranging the Quick Menu
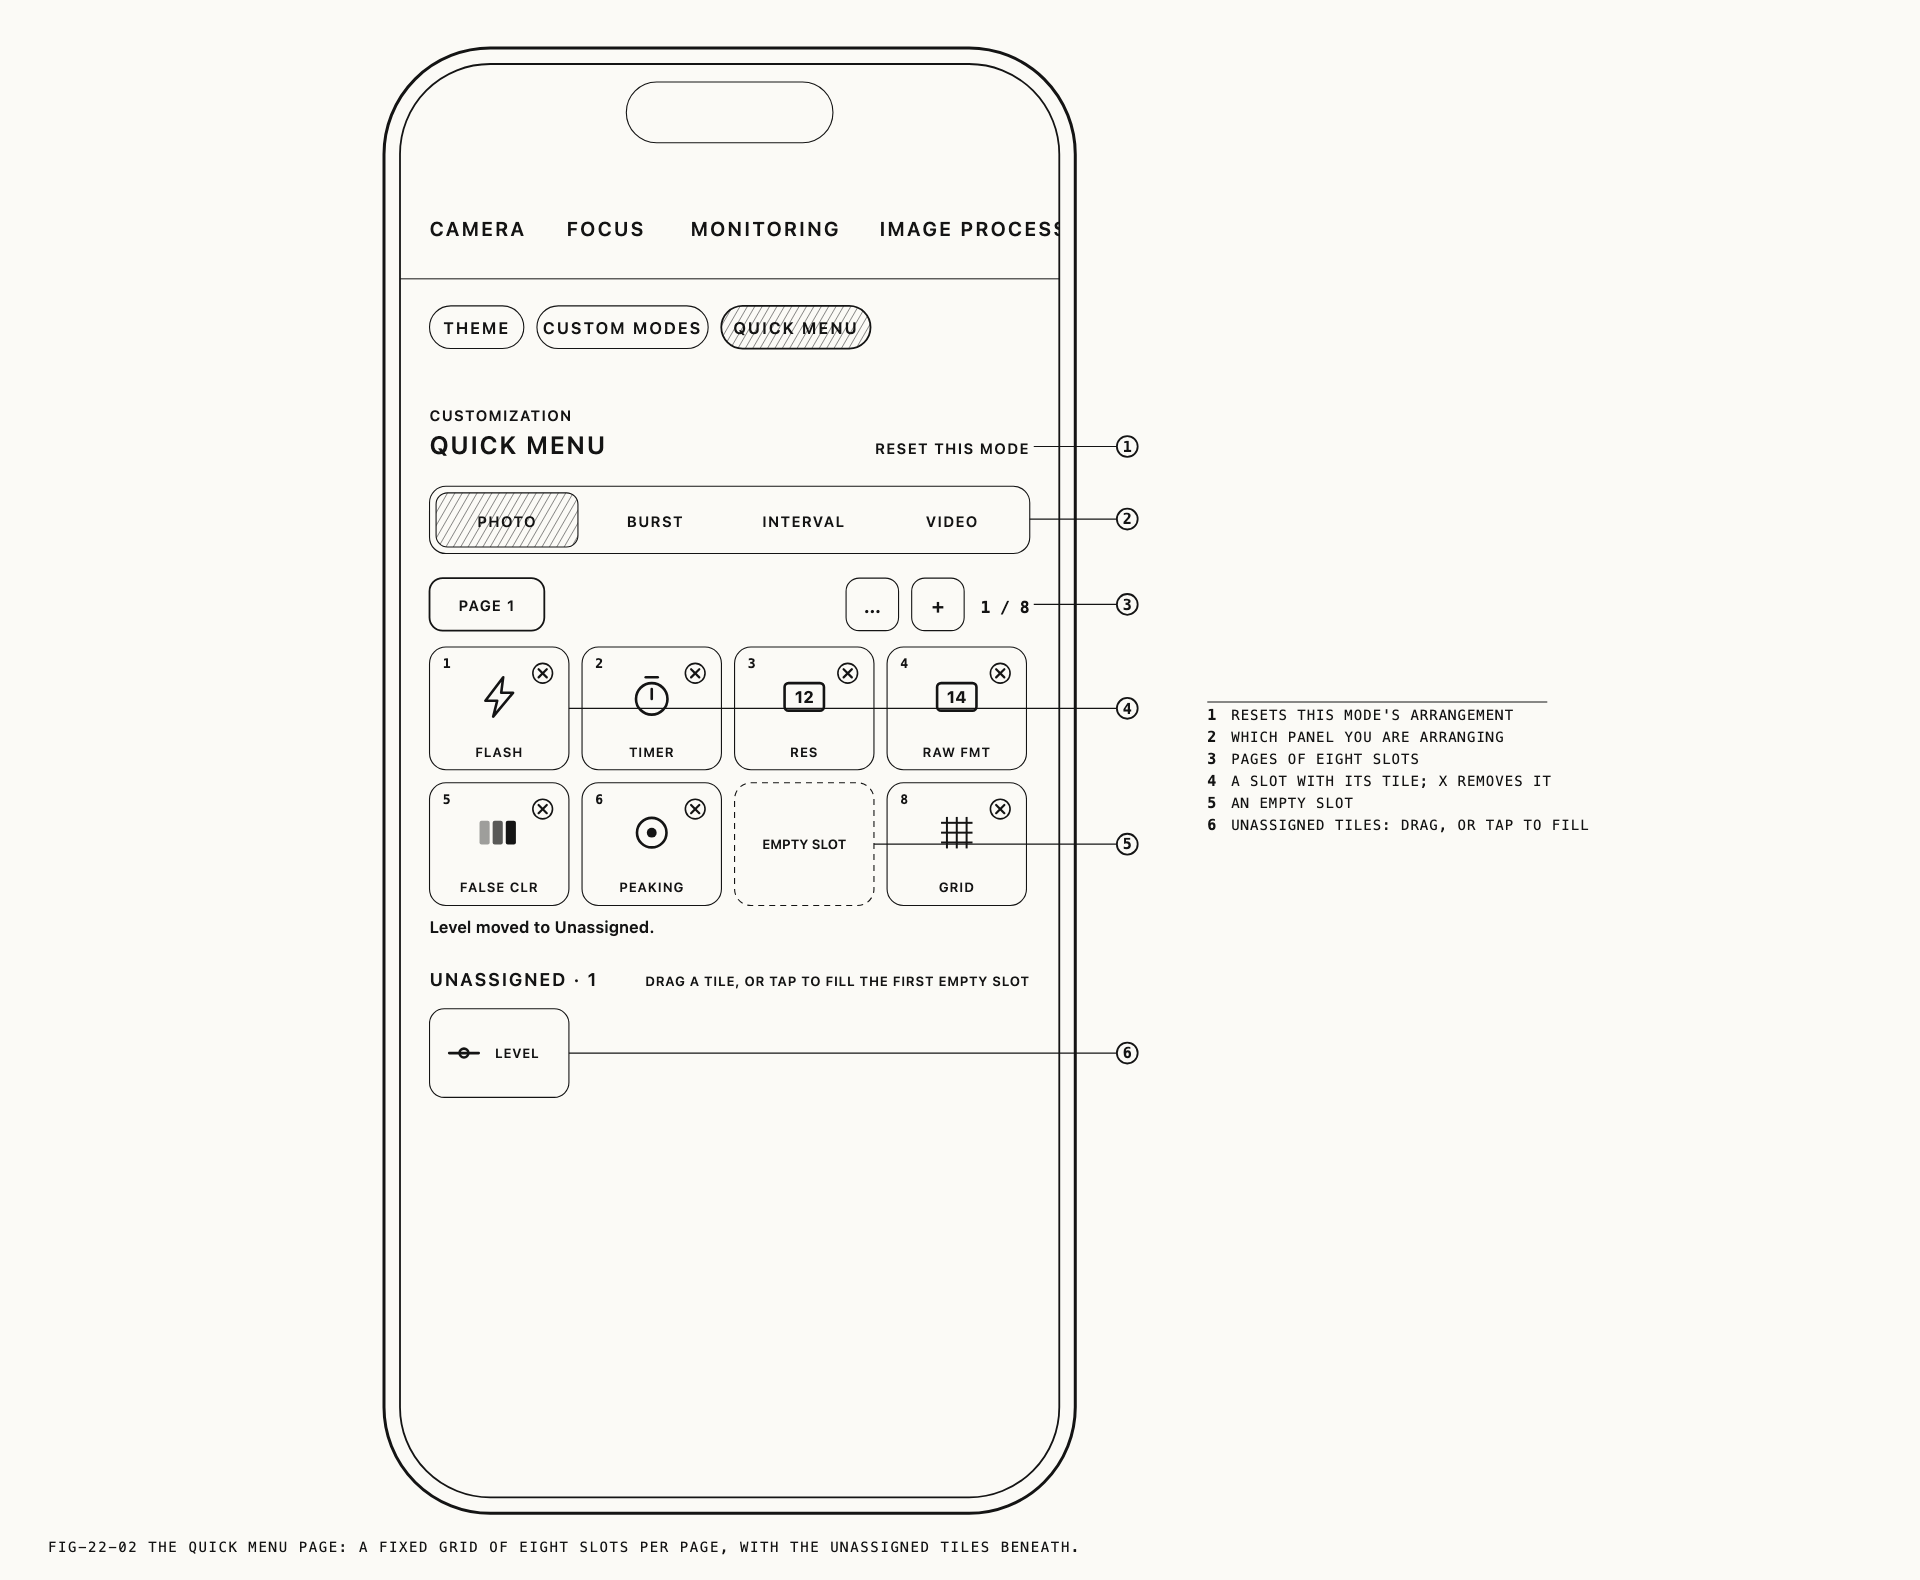
Each of the four panels keeps its own arrangement, and each is edited on its own page.
Where to arrange them: Settings → Customization → Quick Menu.
In photo mode the tab also carries Burst Quick Menu and Interval Quick Menu. In video
mode there is one page, Quick Menu, since video has no drive modes.
A page lists every tile that panel can carry, numbered in the order the tiles fill the grid: left to right, then top to bottom. Press and hold a row and drag it to a new position. The numbers renumber as you drag, and the order is kept as soon as you release, so there is nothing to confirm. The first eight tiles occupy the first page of the panel and the rest follow on the next.
Rows carry the same glyph the tile carries, at its current value, so the list reads as the panel it arranges.
Note: Burst and the intervalometer offer fewer tiles than the grid holds.
← 21. Remote Monitoring and Control · Contents · 23. Customization →